Thursday, September 30, 2010

Random pics of D-man vs Paul

I took these pics awhile ago; actually I took them back in August when D-Man was here.

In honor of D-Man's b-day, I thought it appropriate to finally put them up. Okay, I admit, the pics got lost in the Photobucket shuffle. Sorry D-Man! =)

First of all, before you go and try to analyze what force D-Man is trying to model, save yourself the time. D-Man never met an Army List he didn't ignore. The battle for D-Man is how many big cats he can place on the table. LOL

The pics do memorialize the special day when D-Man brought KT 214 out for its first test spin. I've posted the pics recently of the King Tiger Sentinel painted for D-Man on a rush order.

It's also the 2nd game. D-Man blew up my tanks rather quickly in the first game. I lasted long enough for Paul to arrive to take the next shift. Paul's a great guy and put his Soviets up against D-Man's cats. The Mission parameters was basically line up the tanks and start shooting - - just what D-Man likes. =)

Here's the pics of the game.

A small sample of D-Man's cats.
Photobucket

Paul's scary white legs and a line of tanks.
Photobucket

Paul sends a big platoon towards Pz IV's and StuGs on the left flank.
Photobucket

They die gloriously!
Photobucket


Paul calls in the VVS for air support!
Photobucket


IS-2 get in on the action.
Photobucket

KT214 goes up in smoke to the VVS! There was much cheering and D-Man covering his face in shame and disgust.
Photobucket

KT 214 and Dedov share a vodka after the battle.
Photobucket


A fun game was had by all and a great way to send D-Man home. Thanks to Paul for being on the receiving end of several 88mm shells.

Monday, September 20, 2010

Smartphones and FoW

Last week the wife and I switched over to Verizon Wireless after being with our carrier for years. Our home happens to be in one of the old carrier's "bad areas" or "no coverage areas" and the wife finally had enough and demanded a switch. It didn't help the old carrier's cause because she hated their phone as well.

Now have each have Samsung Fascinate's (aka Galaxy). It's my first truly smartphone and the 4.3" screen is a big bonus for my eyes (along with the wife's) and I LOVE the touchscreen.

Back in May, WWPD did an article about the Ipad and wargamming (read it here).

It got me thinking about how to use the Fascinate for wargamming, especially when compiling After Action Reports. Would referencing the phone slow the game down? What about using a dice generator? How about looking up rules or army lists? Is the camera quick and easy to use?

Right off the bat, I'm going to import my Army Lists (along with their stats) into the phone. Now I don't have to dig and rummage through legal pads to find an army, nor into the sourcebooks to find stats.

Here's my MW 11th Panzer Division list viewed with the SheetToGo ap.
Photobucket

I downloaded the Adobe Acrobat ap and lo and behold, it's a RAM hog just, so I quickly deleted it. I thought I was screwed with PDF readers, but then I found that Samsung has Open Office ap already loaded and can read PDF's. Sweet! Here's the Soviet Intelligence Briefing cover page.
Photobucket

Inside the Soviet Intelligence Briefing. The Samsung phone has the "pinch" function, so you can zoom in and "draw back" with ease.
Photobucket

FOW's Quick Reference Guide. A must for any game.
Photobucket

Dice Generator
Photobucket

What a horrible roll! 10 dice and 3 hits versus Veterans in the open. I'm not sure I'll use this ap. I like the feel of rolling dice, especially when you pick up 30+ MG dice and wink at my buddy before I blow apart his dug-in infantry. =)

The ap only lets you roll 10 dice at a time, so that's not very useful for a player who has a Soviet Army. Besides, many people place dice next to the units hit during allocation and it's also useful to know which units need to make saves.

There's a Note Taker ap that allows a person to put notes on a photo, which is a very useful thing for creating AAR's. I'm sure there's more aps out there that can aid a game of FOW.

I need to learn how to multi-task on this phone, so I can quickly go from Army List to Quick Reference Guide to Intelligence Briefing and the Mission PDF's without slowing the game now.

As always, thanks for stopping by.

Wednesday, September 15, 2010

King Tiger 214

The nephew was out last month for a visit. Last year, I got him hooked on FOW. I know he's hooked because he shipped his tanks in advance of his arrival rather than having to check them in as a carry-on at the airport. =)

Anyway, the nephew showed great restraint at Brookhurst Hobbies, despite wanting to buy everything in the store. He resisted because he knew there were upcoming trips and he wanted to save his money, that he earned from mowing countless lawns back home, for the remainder of his visit. I was rather proud of his mature decision, so I fired off an e-mail to Carlos of Sentinel Miniature Painting to see if he can do a very quick commission.

He did! The photos are KT 214, which Carlos managed to complete in 2 days and have them arrive the next day. A 3-day turn around is pretty darn impressive!!

Thanks Carlos, you made a kid very happy!


Photobucket

Photobucket

Photobucket

Photobucket

Photobucket

Photobucket

Wednesday, September 8, 2010

M4A2 Shermans with two different washes

I received a couple of M4A2's, so I painted them up for the 229th / 3rd Gv Mech Corps.

I didn't use the Army Painter dip. Instead, I wanted to try Badab Black and Devlan Mud washes.

Sherman 02 is washed with Badab Black. Sorry, the camera flash distorts the color, but the green is much darker in better light.
Photobucket


Sherman 03 is ashed with Devlan Mud. I liked how Devlan Mud can weather the decals. Also, I think it takes several coats or layers of Devlan Mud for it to be effective.
Photobucket

The turrets and hulls are magnetized. If I get more Battlefront M4A2's, I'll remember to stop putting the main gun at a raised elevation.

Hull decals still have that faint outline, despite using Micro Sol and Micro Set, plus liberal use of Testors Dullcoat. The camera picks up every detail with 3X Zoom, so I can't be too harsh on myself. The decal outline is barely noticeable without focusing on it.

I'm at a crossroads though. The prices of individual tanks is eating my gaming budget. I may decide to just strip and repaint the Old Glory M4A2's. Doing so will put two armies out of action though, so I'm a little reluctant to do it right now with modeling time limited.

The other thing I have to consider is after the Budapest books is out and there are M4A2(76)'s available, how much is it going to cost to equip? If I go with Old Glory, then I'd want to use the Old Glory M4A2's, because they're the same scale. Battlefront minis are slightly bigger.

I guess I'll wait until Budapest is out later this year.

Thanks for stopping by!

Wednesday, September 1, 2010

Mid-War AAR: 229th vs Mittlere PzKp

Paul invited me over to his place for a game of FOW. It took a couple of weeks for a weekend to free up, but we got a game in two weeks ago.

Hold the Line was rolled for the mission and Paul "won" the dice roll to attack.

229th Separate Tank Regiment
HQ Sherman M4A2
8x Sherman M4A2 w/tankos
8x Sherman M4A2 w/tankos (reserve)
2x SU-152 (ambush)
3x BA-10M (reserve)


I'm not 100% solid on Paul's panzerkompanie.

Best guess -

Mittlere Panzerkompanie
HQ Pz IIIJ, Pz IVF2, Famo
3x Pz IVF1
4x Pz IIIJ
3x Pz IVF2
4x Pz 38(t)
2x SdKfz 7(20mm Flak)


Photobucket

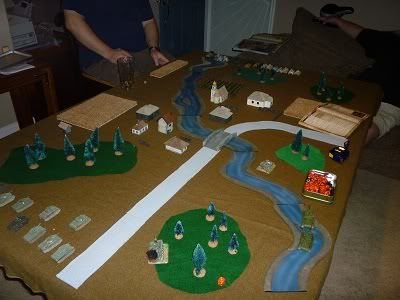
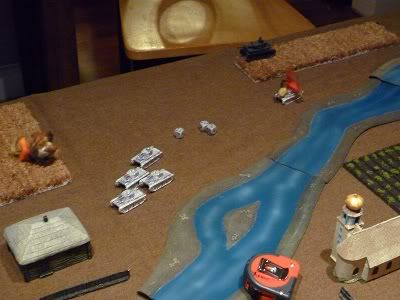
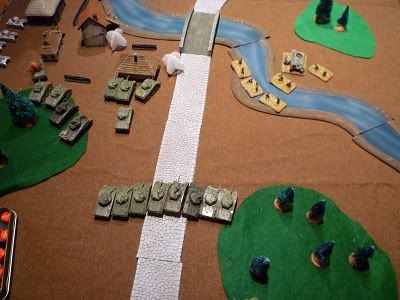
The battleground with me defending the close table edge. Paul slapped his objective on the other side of the river bend. I thought I was screwed when he did that because the whole area was open. I considered if I made the right choice for table side to defend.

I place my objective in the trees. Paul painted the objective as a smoking Su-152; I hoped it wasn't a bad omen.

Photobucket

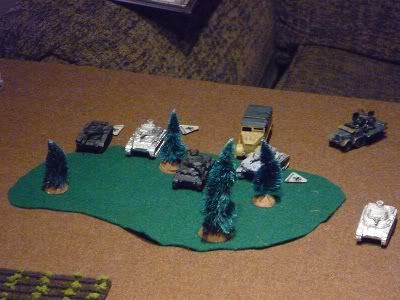
And away we go! Game starts. Paul starts by bogging 2 of this tanks in the forest. FAMO trundles over, avoids a bog, to help out.

Photobucket

Panzer III platoon says "Cya!" to the bogged tanks.

Photobucket

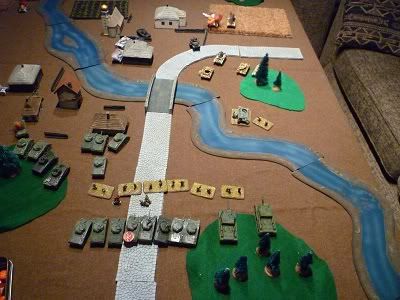
I doubled my Sherman platoon into the village, hiding behind buildings and seeking concealment. See the group of 3 tanks facing the building? Okay, now look at the middle tank. That boy didn't move the rest of the game for various reasons. It got crowded and there was no place to put him without putting him in the open and losing concealment for the rest of the platoon. That tank didn't shoot or move and the crew just picked their nose the whole game. =)

Photobucket

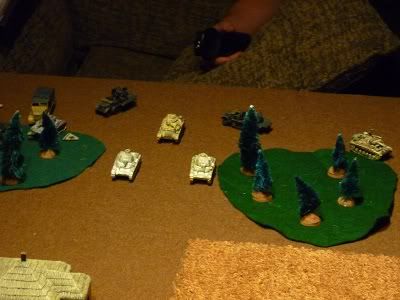
Pz 38(t)'s making a dash down Paul's right flank past the 2iC burning tank.

Photobucket

Paul second point of attack reaches the road. I manage to pick off a tank using the 32" range of the Sherman 75mm. It's a big difference versus a T-34's 76mm range of 24". Pauls Pz III's can't hurt me at 32".

Photobucket

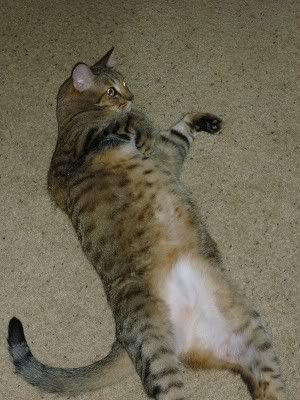
Paul's cat, looking for belly rubs between turns.

Photobucket

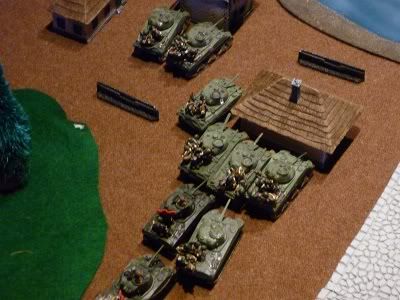
At this point I realize I have nothing to contest an objective once Paul's tanks reach it. I send the dismounted tankos out into the open and racing towards the objective. They suffer heavily, but rally from pinning and proceed towards the objective.

Paul's F1's smoke a couple of my Shermans, while the Pz 38(t) go for the flank. This first platoon of Shermans did yeoman's work, scored good kills on Paul's forces.

It's been about 2 turns, no reserves for me and I'm holding onto my ambush.

Photobucket

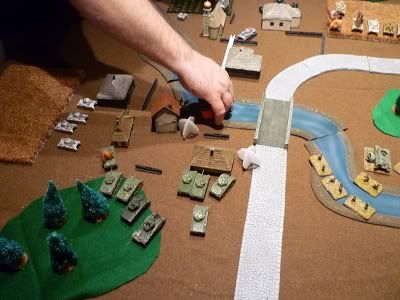
Paul sneaking to the edge of the village. We try to snipe one another. Paul leaves a couple of tanks in the open, which means no concealment.

Photobucket

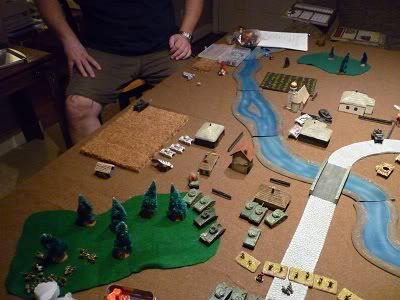
Reserves arrive. I form a gunline. This formation is bad news if artillery or airpower is present.

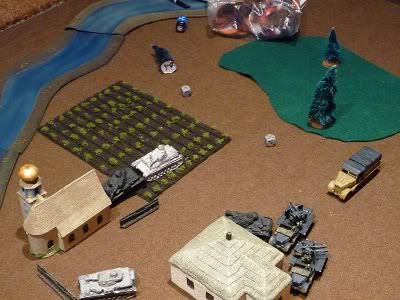
Tanko survivors hang onto the objective.

Photobucket

Paul's forces take a withering fire. Not shown in the screen is the decimated Pz III platoon with its lone survivor fleeing the board. Paul picked up the burning hulks because he knew the end was near.

What's not apparent in the photos is how close Paul is to winning. His AA flak platforms kept blowing apart the tankos. I had nothing to contest that objective. I waited too long to pop my ambush, otherwise the Su-152's would be in that forest.

Photobucket

The Pz 38(t)'s eventually sneak into the forest (I back 4 tanks into the forest - bogging 1 - after this photo to counter the flanking maneuver) and get side shots on the Shermans. He finds out that AT6 versus SA4, doesn't work too well. I make my saves and then rotate the turrets and blow apart the 38t's.

What slowed down the 38(t)'s were the BA-10's, who skirted around the other side of the forest to threaten them. It cost Paul a couple of turns to deal with them (making them Disengage twice).

I pop the Su-152's on Turn 4. They blow up the CiC with FP1+. Paul is down too many platoons and auto-fails.

Game to the 229th!

I'm getting used to the 229th. The trick is to make sure I am focusing all my fire on one platoon at a time. I want at least 5 tanks firing. When the platoon is stationary, I was rolling 10-14 dice at a time. Even if I need 6's, I'm going to get 1 or 2 and with FP 3+, there's a good chance a panzer is going to die.

Another thing I learned - the tankos aren't sacrificial lambs. I was close to morale checks with the 1st platoon. If Paul killed a couple more tankos, I ran the risk of the Sherman platoon failing morale and leaving even though they only lost 2 tanks.

The 2nd platoon's gunline was devastating. 16 dice of goodness roaring down range made short work of that flank and kept the objective from being claimed.

Paul also failed all of his platoon checks. A bit of bad luck there. There's also the matter of a couple of failed Stormtrooper rolls that left the F1 and IIIJ tank platoons in the open and exposed.

Paul's fun to play with and his fiance was gracious enough to cook a Thai meal. Yum!!!